Imagine a dessert that combines the rustic charm of a homemade crisp with the irresistible allure of hand-held pocket pies. This Apple Pear Crisp and Pocket Pies recipe is not just a dessert—it's a culinary adventure that transforms simple ingredients into a mouthwatering masterpiece that will have your family and friends begging for seconds. Whether you're a baking novice or a seasoned pro, this recipe promises to deliver a perfect balance of sweet, buttery, and cinnamon-spiced goodness that will transport you to a cozy kitchen filled with warmth and love.
Prep Time: 20 mins
Cook Time: 30 mins
Total Time: 50 mins
Cuisine: American
Serves: 6 servings
Ingredients
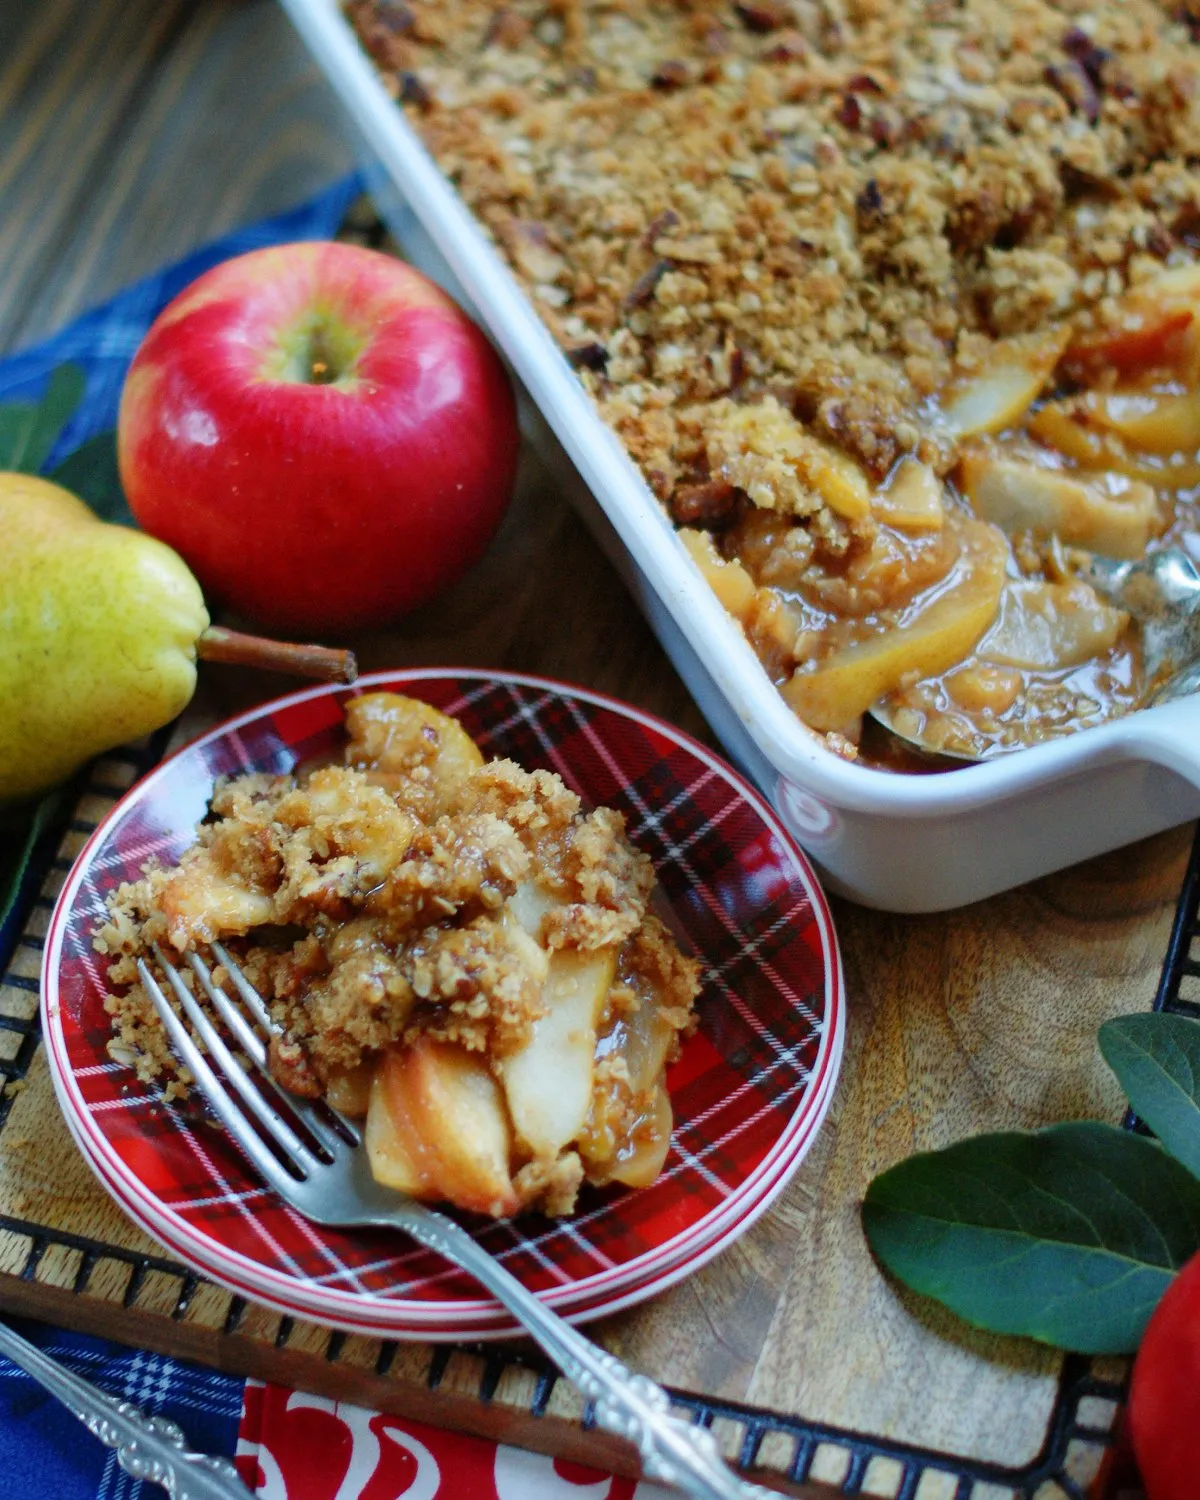
- 2 apples, peeled and diced
- 2 pears, peeled and diced
- 1 cup brown sugar
- 1 cup rolled oats
- 1/2 cup all-purpose flour
- 1 teaspoon cinnamon
- 1/2 cup butter, melted
- 1 package pie crusts
Instructions
- Preheat your oven to 350°F (175°C). This will ensure that your Apple Pear Crisp and Pocket Pies bake evenly.
- Prepare your fruits by peeling and dicing the apples and pears. Aim for uniform pieces to ensure even cooking.
- In a large mixing bowl, combine the diced apples and pears. Sprinkle 1/2 cup of brown sugar over the fruit and toss gently to coat. Set aside to allow the flavors to meld.
- In another bowl, mix together the rolled oats, all-purpose flour, remaining 1/2 cup of brown sugar, and cinnamon. Stir until well combined.
- Pour the melted butter into the oat mixture and mix until the butter is evenly distributed and the mixture is crumbly.
- Grease a baking dish with a bit of butter or cooking spray. Pour the fruit mixture into the bottom of the dish, spreading it out evenly.
- Sprinkle the oat mixture over the top of the fruit, ensuring it covers the fruit evenly.
- Place the baking dish in the preheated oven and bake for 30 minutes, or until the top is golden brown and the fruit is bubbling.
- While the crisp is baking, prepare the pocket pies. Roll out the pie crusts on a lightly floured surface. Use a round cutter or a glass to cut out circles of dough.
- Take a small amount of the remaining diced apples and pears and place them in the center of each dough circle. Be careful not to overfill.
- Fold the dough over to create a half-moon shape and crimp the edges with a fork to seal. You can also brush the tops with a bit of melted butter and sprinkle a little sugar for added sweetness and shine.
- Arrange the pocket pies on a baking sheet lined with parchment paper. Bake in the same oven for about 15-20 minutes, or until they are golden brown.
- Once the Apple Pear Crisp is done, remove it from the oven and let it cool for a few minutes before serving. Serve warm with a scoop of vanilla ice cream if desired.
- Enjoy your delicious Apple Pear Crisp and Pocket Pies as a delightful dessert or snack!
Tips
- Choose ripe but firm apples and pears for the best texture and flavor. Varieties like Granny Smith, Honeycrisp, or Bosc pears work wonderfully.
- For a more uniform crisp topping, use cold butter and work it into the dry ingredients with your fingertips to create a crumbly texture.
- To prevent soggy pocket pies, make sure your fruit filling isn't too wet. Drain excess liquid before filling the pie dough.
- Experiment with spices! While cinnamon is classic, try adding a pinch of nutmeg or cardamom for extra depth of flavor.
- For a golden, shiny crust on your pocket pies, brush with an egg wash (beaten egg with a splash of water) before baking.
- Let the crisp cool for 10-15 minutes before serving to allow the filling to set and become less runny.
- Serve with a scoop of vanilla ice cream or a dollop of whipped cream to elevate this dessert from delicious to absolutely irresistible!
Nutrition Facts
Calories: 380kcal
Carbohydrates: 55g
Protein: 4g
Fat: 18g
Saturated Fat: 10g
Cholesterol: 45mg