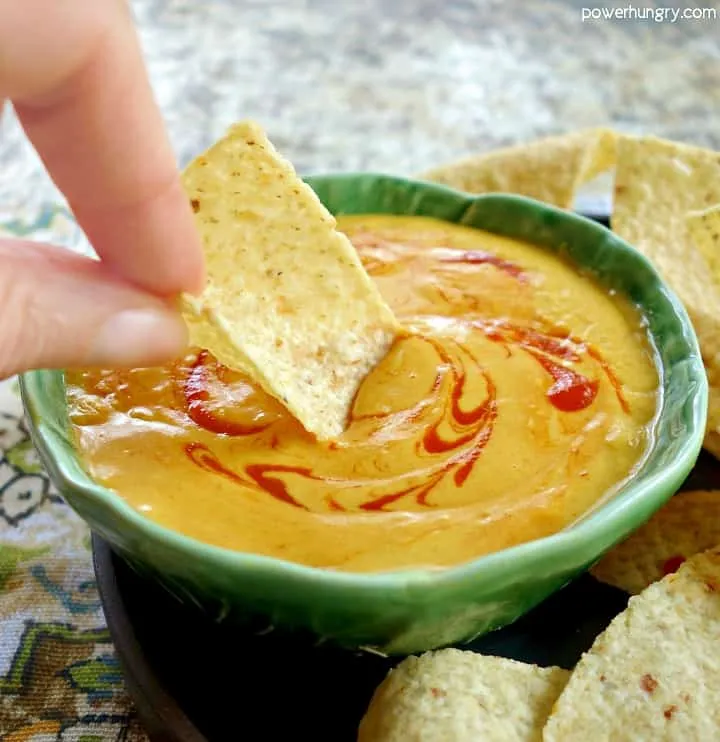
Are you ready to elevate your snacking game with a mouthwatering twist? Dive into the world of plant-based indulgence with our creamy Chickpea Flour Queso! This vegan delight is not only rich and cheesy but also incredibly easy to whip up in just 20 minutes. Perfect for dipping, drizzling, or devouring by the spoonful, this queso is sure to impress even the most dedicated cheese lovers. Say goodbye to store-bought dips and hello to a homemade version that’s bursting with flavor and nutrition. Curious how to make this delectable dish? Let’s get cooking!
Prep Time: 5 mins
Cook Time: 15 mins
Total Time: 20 mins
Cuisine: Vegan
Serves: 2 cups
Ingredients
- 1 cup chickpea flour
- 2 cups vegetable broth
- 1 tablespoon nutritional yeast
- 1 teaspoon garlic powder
- 1 teaspoon onion powder
- 1 teaspoon smoked paprika
- Salt to taste
- Optional toppings (jalapeños, cilantro, etc.)
Instructions
- In a medium saucepan, whisk together chickpea flour and vegetable broth until completely smooth, ensuring no lumps remain. This initial mixing is crucial for achieving a creamy texture.
- Place the saucepan over medium heat, stirring constantly to prevent the mixture from sticking or burning. The constant whisking helps develop a smooth, consistent base.
- Add nutritional yeast, garlic powder, onion powder, smoked paprika, and salt to the mixture. Continue stirring to incorporate all spices evenly throughout the sauce.
- Cook the mixture for 10-12 minutes, stirring frequently. The sauce will gradually thicken and become more cheese-like in consistency. If it becomes too thick, add a little more vegetable broth to thin it out.
- Once the sauce reaches a smooth, creamy texture that coats the back of a spoon, remove from heat. Let it sit for 2-3 minutes to continue thickening naturally.
- Transfer the queso to a serving bowl. If desired, garnish with optional toppings like chopped jalapeños, fresh cilantro, or a sprinkle of additional smoked paprika.
- Serve immediately with tortilla chips, as a dip, or as a sauce for nachos. The queso can be stored in the refrigerator for 3-4 days and reheated gently with a splash of broth.
Tips
- Whisk Thoroughly: When combining the chickpea flour and vegetable broth, ensure you whisk until completely smooth to avoid any lumps. This step is crucial for achieving that creamy, velvety texture.
- Stir Constantly: While cooking, keep stirring the mixture over medium heat. This prevents it from sticking to the pan and helps develop a consistent base, ensuring a smooth sauce.
- Adjust Consistency: If your queso becomes too thick during cooking, don’t hesitate to add a splash more vegetable broth to achieve your desired consistency. It should be creamy enough to coat the back of a spoon.
- Customize Your Flavor: Feel free to experiment with additional spices or herbs to suit your taste. A pinch of cayenne can add a nice kick, while fresh herbs can enhance the flavor profile even more.
- Serve Fresh: This queso is best enjoyed immediately while it’s warm and creamy. Pair it with your favorite tortilla chips, or use it as a delicious topping for nachos or burritos.
- Storage Tips: If you have leftovers, store them in an airtight container in the refrigerator for up to 3-4 days. Reheat gently on the stove with a splash of broth to restore its creamy texture.
Nutrition Facts
Calories: 45kcal
Carbohydrates: 6g
Protein: 3g
Fat: 1g
Saturated Fat: 0g
Cholesterol: 0mg