Imagine a pie-baking method so simple and foolproof that it'll make you feel like a culinary genius! The Easy Brown Bag Apple Pie is not just a recipe; it's a delightful cooking hack that transforms ordinary ingredients into an extraordinary dessert. This nostalgic American classic promises a perfectly baked pie with minimal effort and maximum flavor, all while using an unexpected kitchen tool - a humble brown paper bag. Get ready to impress your family and friends with a technique that locks in moisture, creates a golden-brown crust, and fills your kitchen with the irresistible aroma of cinnamon-spiced apples!
Prep Time: 20 mins
Cook Time: 50 mins
Total Time: 1 hrs 10 mins
Cuisine: American
Serves: 6 servings
Ingredients
- 1 brown paper bag
- 1 pie crust
- 4 cups sliced apples
- 1 cup sugar
- 1 tsp cinnamon
- 2 tbsp flour
- 1 tbsp lemon juice
Instructions
- Preheat the oven to 425°F (218°C). Ensure the oven rack is positioned in the center of the oven.
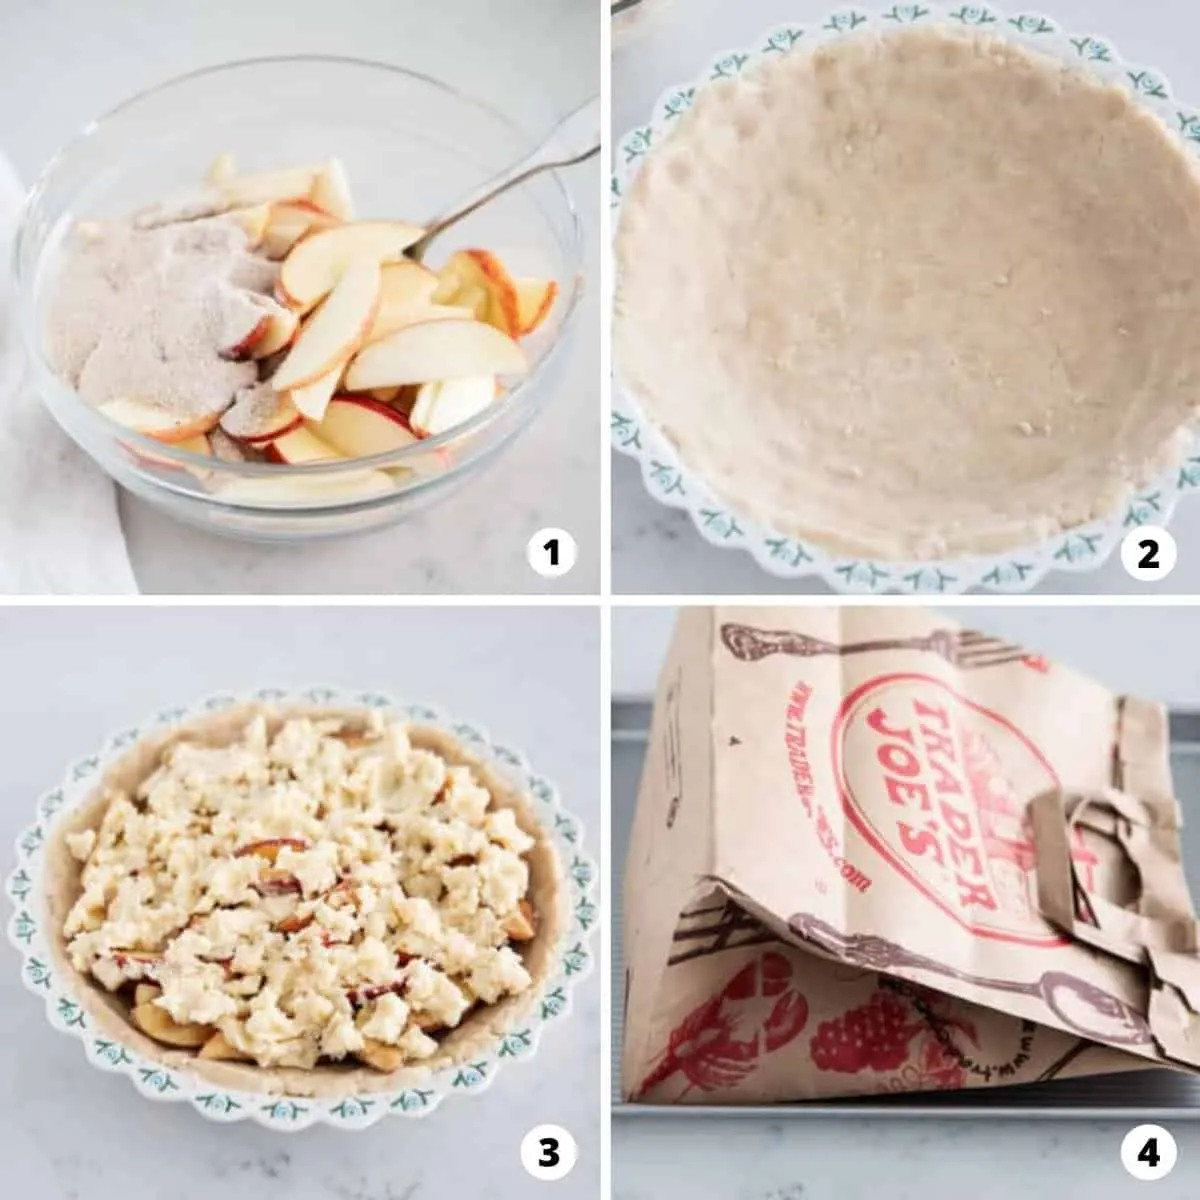
- In a large mixing bowl, combine sliced apples, sugar, cinnamon, flour, and lemon juice. Gently toss until apples are evenly coated with the mixture.
- Roll out the pie crust and carefully place it into a 9-inch pie dish, crimping the edges decoratively.
- Pour the apple mixture into the prepared pie crust, spreading it evenly and creating a slight mound in the center.
- Take a clean brown paper bag large enough to completely cover the pie. Carefully slide the pie into the bag, ensuring the bag is not touching the pie's surface.
- Fold the open end of the bag tightly and secure it with staples or paper clips to create a sealed environment.
- Place the bagged pie on a sturdy baking sheet to catch any potential drips and prevent mess in the oven.
- Bake in the preheated oven for approximately 50 minutes. Do not open the bag during baking.
- After 50 minutes, carefully remove the baking sheet from the oven and cut open the bag using scissors.
- Check that the apples are tender and the crust is golden brown. If needed, return to the oven for an additional 5-10 minutes.
- Allow the pie to cool for 15-20 minutes before serving. This helps the filling set and makes slicing easier.
- Serve warm, optionally topped with vanilla ice cream or whipped cream.
Tips
- Apple Selection: Choose firm, tart apples like Granny Smith or Honeycrisp for the best texture and flavor balance.
- Bag Safety: Always use a clean, unbleached brown paper bag without any printing or coatings to ensure food safety.
- Crust Preparation: For extra flakiness, chill your pie crust for 30 minutes before filling and baking.
- Even Slicing: Use a mandoline or sharp knife to create uniform apple slices that cook evenly.
- Moisture Control: If your apples are very juicy, add an extra tablespoon of flour to prevent a soggy bottom.
- Bag Sealing: Ensure the bag is sealed tightly to create a steamy environment that keeps the pie moist.
- Oven Placement: Use the center rack for consistent heat distribution and even baking.
- Cooling Patience: Let the pie rest for 15-20 minutes after baking to allow the filling to set properly.
- Serving Suggestion: A scoop of vanilla ice cream or a dollop of whipped cream takes this pie to the next level!
Nutrition Facts
Calories: 320kcal
Carbohydrates: 55g
Protein: 2g
Fat: 12g
Saturated Fat: 4g
Cholesterol: 10mg