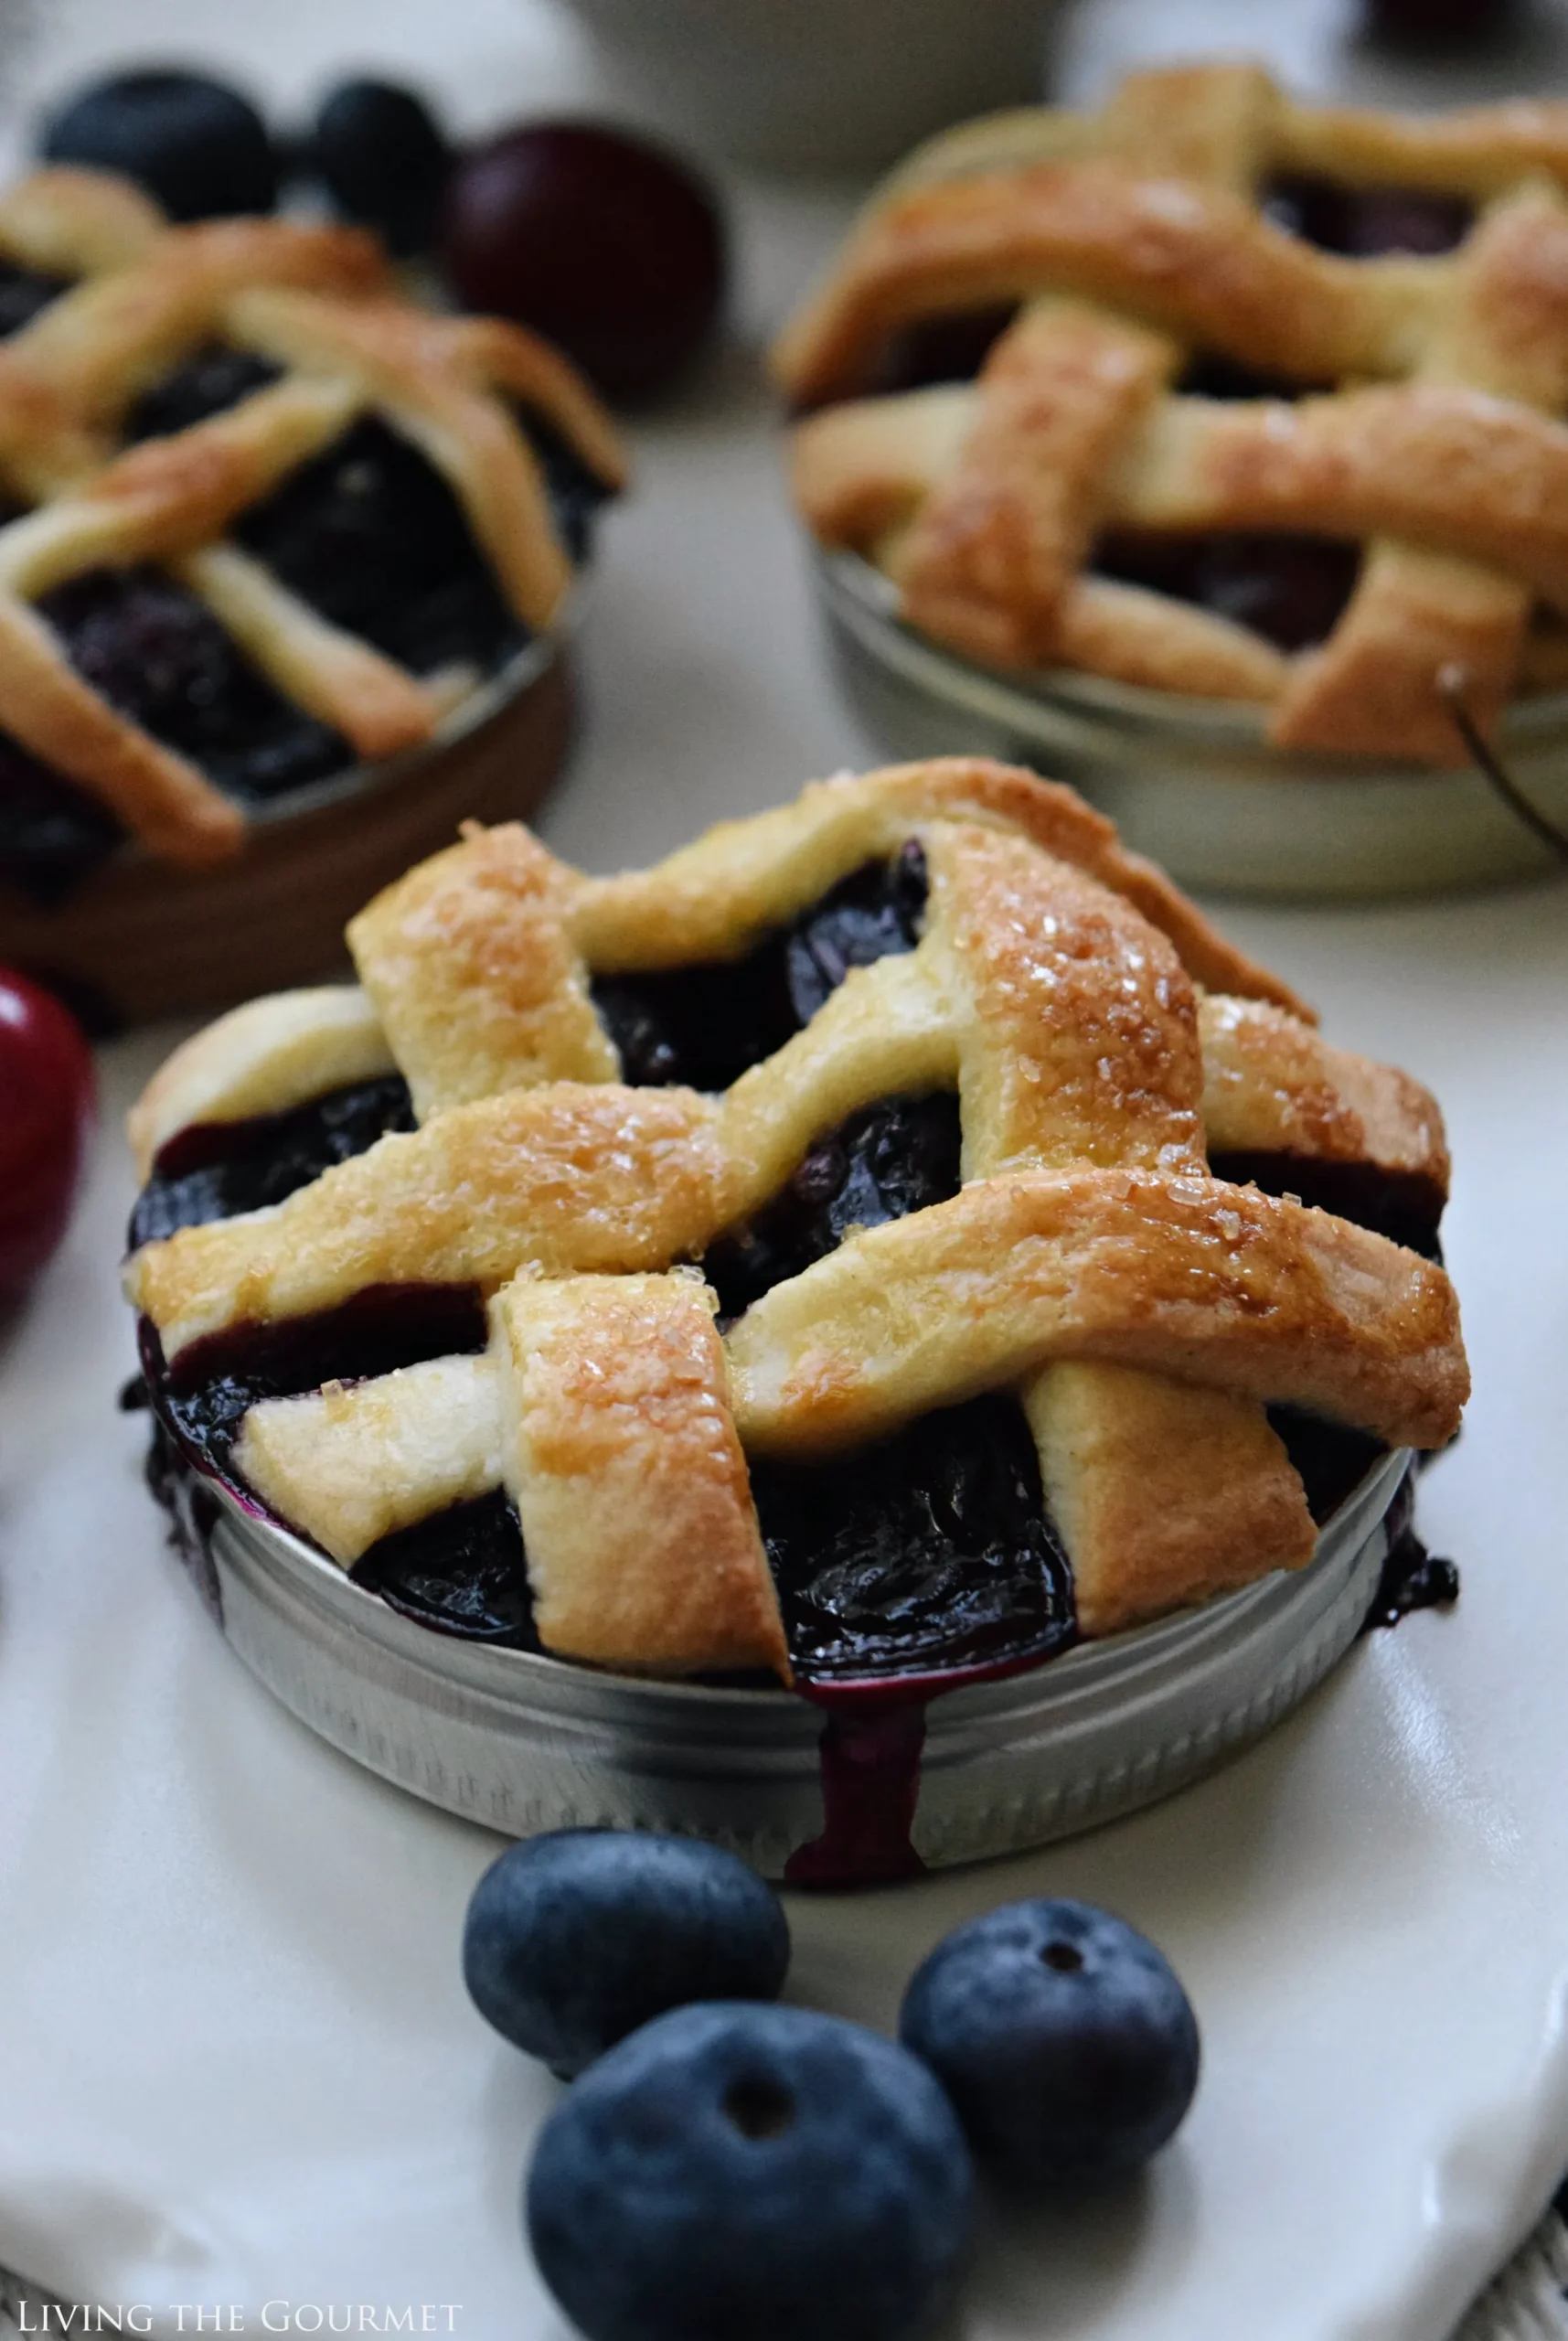
Imagine creating adorable, perfectly portioned pies that fit right in the palm of your hand - without any special baking equipment! These Mason Jar Lid Pies are about to revolutionize your dessert game, transforming ordinary pie-making into a fun, creative culinary adventure. Whether you're a baking novice or a seasoned pro, these mini masterpieces will impress your friends, delight your family, and satisfy your sweet tooth with minimal effort and maximum charm.
Prep Time: 20 mins
Cook Time: 30 mins
Total Time: 50 mins
Cuisine: American
Serves: 8 mini pies
Ingredients
- 1 package refrigerated pie crusts
- 1 cup fruit filling (your choice)
- 1 tablespoon sugar (for topping)
- 1 egg (for egg wash)
Instructions
- Preheat the oven to 375°F (190°C). Prepare a baking sheet by lining it with parchment paper.
- Remove the refrigerated pie crusts from the packaging and let them sit at room temperature for 10 minutes to become more pliable.
- Carefully remove the inner rings from 8 mason jar lids, keeping only the flat metal lids as your pie mold base.
- Unroll the pie crusts and use a rolling pin to slightly thin and smooth the dough if needed.
- Cut circles of dough slightly larger than the mason jar lids to ensure proper coverage. You'll need bottom and top crusts for each mini pie.
- Gently press the bottom crust circles into the flat mason jar lids, ensuring they cover the entire surface with a slight overhang.
- Fill each pie base with approximately 2 tablespoons of your chosen fruit filling, leaving a small border around the edges.
- Cut matching top crust circles and place them over the filled bases. Crimp and seal the edges using a fork to create a decorative border.
- In a small bowl, whisk the egg to create an egg wash. Brush the top of each mini pie with the egg wash.
- Sprinkle the tablespoon of sugar evenly across the tops of the pies for a golden, sparkling finish.
- Cut small venting slits in the top crusts to allow steam to escape during baking.
- Place the prepared mason jar lid pies on the parchment-lined baking sheet.
- Bake in the preheated oven for 25-30 minutes, or until the crusts are golden brown and the filling is bubbling.
- Remove from the oven and let cool on the baking sheet for 10 minutes before carefully transferring to a wire rack.
- Serve warm or at room temperature. For easy removal, gently push the pies up from the bottom of the mason jar lids.
Tips
- Temperature Matters: Let your refrigerated pie crusts sit at room temperature for exactly 10 minutes - this makes them more pliable and easier to work with.
- Fruit Filling Flexibility: While the recipe suggests any fruit filling, consider using thicker, less watery fillings to prevent soggy crusts. Apple, cherry, or blueberry work wonderfully.
- Egg Wash Secrets: For a professional bakery-like golden sheen, brush your egg wash carefully and evenly. Don't skip the sugar sprinkle - it adds a delightful sparkle and crunch.
- Venting is Crucial: Those small slits you cut in the top crust aren't just decorative - they allow steam to escape and prevent your pies from becoming soggy.
- Cooling Technique: Let the pies rest on the baking sheet for 10 minutes after removing from the oven. This helps them set and makes removal easier.
- Storage Tip: These mini pies are best enjoyed fresh but can be stored in an airtight container at room temperature for 1-2 days.
Nutrition Facts
Calories: kcal
Carbohydrates: g
Protein: g
Fat: g
Saturated Fat: g
Cholesterol: mg